How to Drag and Drop using Modifier.dragAndDropSource/Target - Jetpack Compose

Unless you’re a Multimillion or a Billion dollar company, you probably don’t have a multimillion-dollar ad budget or professional Spinners. Your product needs to stand out on its own merits like App Quality, Performance, UI design, and User Experience. Most companies don't care about you, your product, and your vision or dreams. They don't give a damn about either their work helped you to get more business, revenue, users, or solving a problem. That's where CANOPAS comes into the picture. Whether you have a GREAT IDEA and you want to turn it into a DIGITAL PRODUCT. OR You need a team that can turn your NIGHTMARES into SWEET DREAMS again by improving your existing product. We help Entrepreneurs, startups, and small companies to bring their IDEA to LIFE by developing digital products for their business. We prefer using Agile and Scrum principles in project management for flexibility and rapid review cycles. We are not bound by technology. We will learn new technology if it significantly improves the performance of your app. We will solve your tech-related problems even though we are not THE EXPERT in it. And we've done it multiple times in the last 7 years. In the last seven years, we helped... A STARTUP to expand its users from 2500 to over 100000 by developing mobile apps for them. An enterprise client to redevelop their app that has 1M+ monthly paid users and 10M+ app downloads. Another enterprise client(5M+ app downloads in each store) to fix bugs and broken parts in the app and as a result, they had over 98% crash-free users. We offer a 100% MONEY BACK GUARANTEE if you don't like our work. No questions asked. Visit : https://canopas.com/blog
In January 2024, a significant Jetpack Compose update was introduced dragAndDropSourceand dragAndDropTarget modifiers, simplifying drag-and-drop interactions compared to the manual approach I previously demonstrated.
You can check it out here.
What we'll achieve at the end of this blog?

Table of contents
Background
Let's Get Started
Design Composable to Show Food Items
Composable to Show Users
Add Drag Source
Add Drop Target
Conclusion
Let’s Get Started
We’ll divide implementation into 4 simple steps to make each step easy to understand.
We’re using the same example of the original post. Let’s quickly have a look at our UI components.
- Design Composable to Show Food Items
fun FoodItemCard(foodItem: FoodItem) {
    Card(
        elevation = CardDefaults.elevatedCardElevation(defaultElevation = 10.dp),
        colors = CardDefaults.elevatedCardColors(
            containerColor = Color.White,
        ), shape = RoundedCornerShape(24.dp),
        modifier = Modifier.padding(8.dp)
    ) {
        Row(
            verticalAlignment = Alignment.CenterVertically,
            modifier = Modifier.padding(10.dp)
        ) {
            Image(
                painter = painterResource(id = foodItem.image),
                contentDescription = null,
                contentScale = ContentScale.Crop,
                modifier = Modifier
                    .size(130.dp)
                    .clip(RoundedCornerShape(16.dp))

            )

            Spacer(modifier = Modifier.width(20.dp))
            Column(modifier = Modifier.weight(1f)) {
                Text(
                    text = foodItem.name,
                    fontSize = 22.sp,
                    color = Color.DarkGray
                )
                Spacer(modifier = Modifier.height(6.dp))
                Text(
                    text = "$${foodItem.price}",
                    fontSize = 18.sp,
                    color = Color.Black,
                    fontWeight = FontWeight.ExtraBold
                )
            }
        }
    }
}

LazyColumn(
    modifier = Modifier.fillMaxSize(),
    contentPadding = PaddingValues(horizontal = 10.dp)
) {
    items(items = foodList) { food ->
        FoodItemCard(foodItem = food)
    }
}
Here's our Food item card.

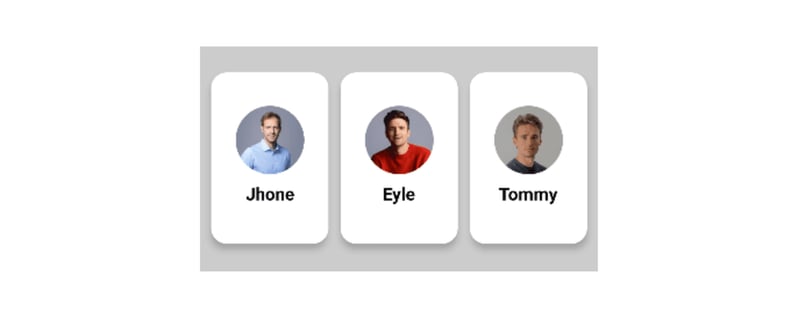
- Composable to Show Users
Now, Let’s add composable to show Persons, we’ll show the profile image and the person’s name on the card.
@Composable
fun PersonCard(person: Person) {
        Column(
            modifier = Modifier
                .padding(6.dp)
                .shadow(elevation = 4.dp, shape = RoundedCornerShape(16.dp))
                .width(width = 120.dp)
                .fillMaxHeight(0.8f)
                .background(Color.White, RoundedCornerShape(16.dp)),
            verticalArrangement = Arrangement.Center,
            horizontalAlignment = Alignment.CenterHorizontally
        ) {
            Image(
                painter = painterResource(id = person.profile), contentDescription = null,
                modifier = Modifier
                    .size(70.dp)
                    .clip(CircleShape),
                contentScale = ContentScale.Crop
            )
            Spacer(modifier = Modifier.height(10.dp))
            Text(
                text = person.name,
                fontSize = 18.sp,
                color = Color.Black,
                fontWeight = FontWeight.Bold
            )
        }
}

// To show a list of users
LazyRow(
    modifier = Modifier
        .fillMaxHeight(0.3f)
        .fillMaxWidth()
        .background(Color.LightGray, shape = RoundedCornerShape(topEnd = 10.dp, topStart = 10.dp))
        .padding(vertical = 10.dp)
        .align(Alignment.BottomCenter),
    verticalAlignment = Alignment.CenterVertically,
    horizontalArrangement = Arrangement.Center
) {
    items(items = persons) { person ->
        PersonCard(person)
    }
}
And here’s the result:
- Add Drag Source
Before we jump into implementation let’s have a quick look at the modifier
Modifier.dragAndDropSource
This Modifier in Jetpack Compose enables an element to become a source for drag-and-drop operations when applied to it.
@Composable
fun MyDraggableComponent() {
    Box(
        modifier = Modifier
            .size(100.dp)
            .background(Color.Blue)
            .dragAndDropSource(
                drawDragDecoration = {
                    // Provide visual representation of the dragged item
                }
            ) {
                // Logic to handle drag-and-drop operation
                startTransfer (/* data to transfer */ )
            }
    ) { /* Content of the draggable component*/ }
}
To read the full version, please visit Canopas Blog.
This blog post was originally published on Canopas.
Conclusion
In conclusion, the introduction of the dragAndDropTarget and dragAndDropSourcemodifiers in Jetpack Compose simplifies the addition of drag-and-drop features.
This streamlined process is a significant improvement over the previous method, showcasing Jetpack Compose's commitment to enhancing developer experiences.
Consider incorporating these modifiers into your projects for a more interactive and enjoyable user experience.
Happy coding! 🚀✨


